|
|
Post by snyper on Jan 9, 2009 8:18:57 GMT 8
The goodies in its respective packaging. 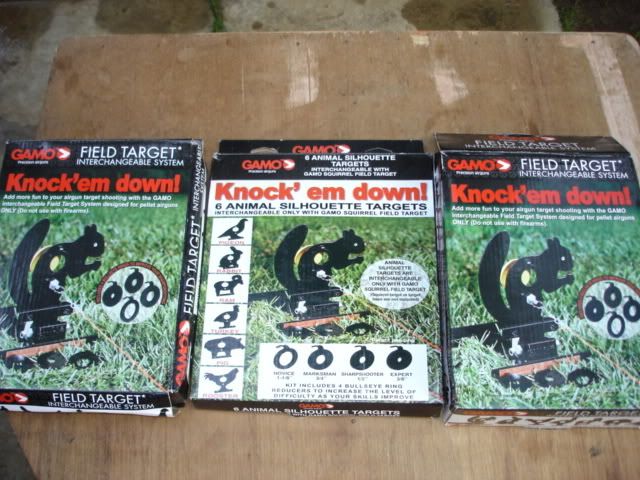 The package contents- the silhouette plate, the stand and paddle mechanism, hole reducers, stakes, and a spool of twisted nylon cord. 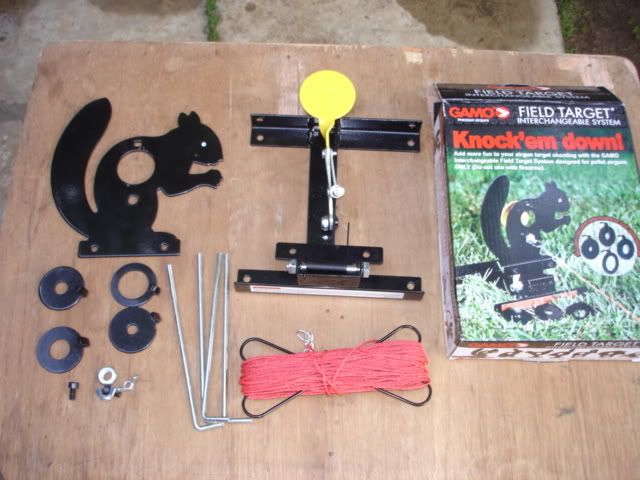 The Pieces assembled together in less than 30 seconds. 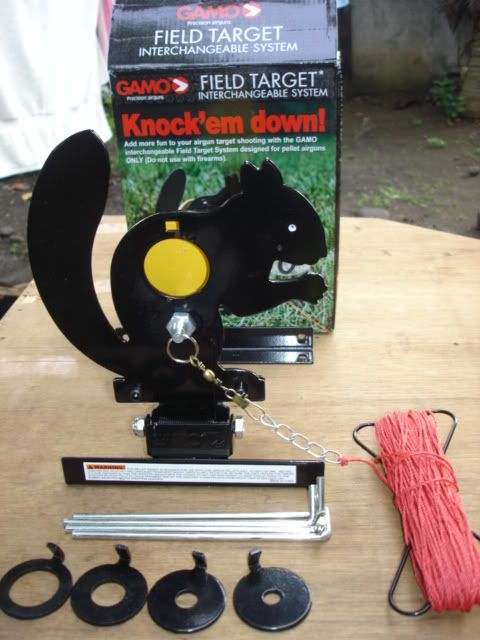 The FT Target fully assembled with the standard size target hole (no reducers attached) 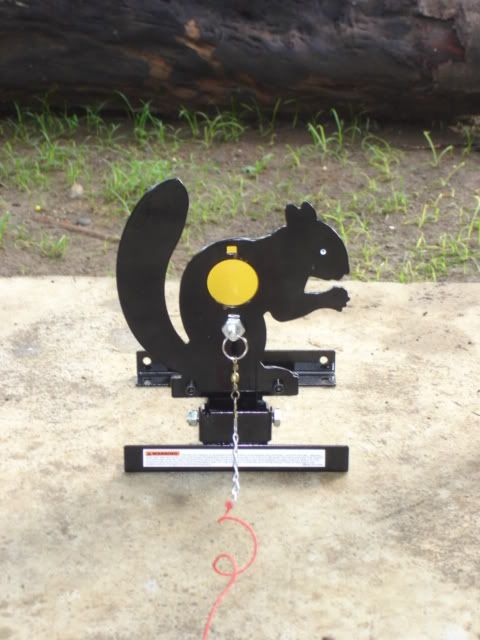 The FT target in knocked-down position after being hit on the target zone. 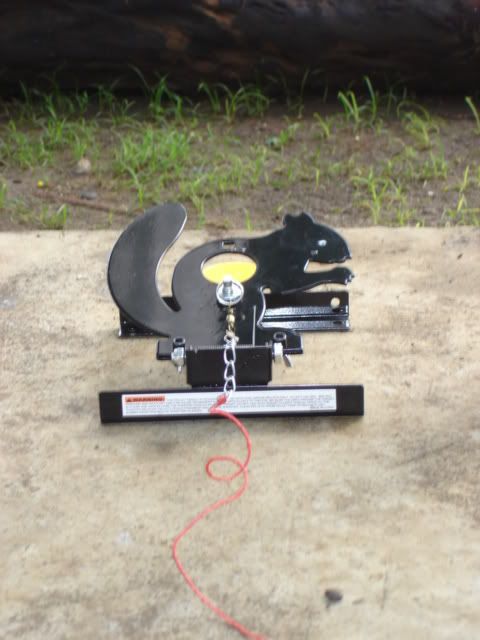 The box containing the replacement silhouettes. 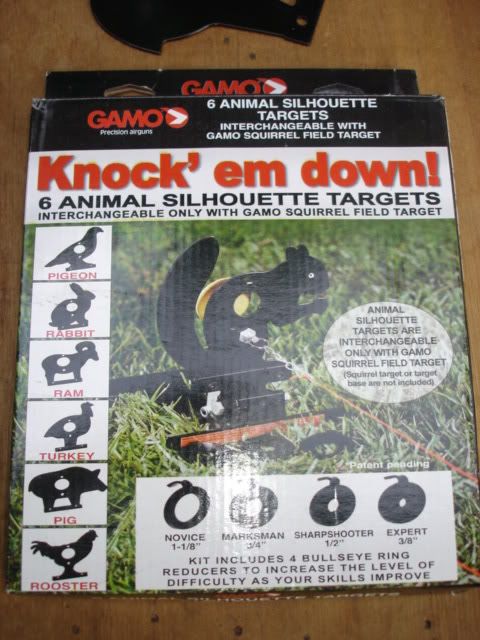 Unpacking the replacement silhouettes - which contains 6 differents figures and is all ready to be attached to the FT mechanism in a matter of seconds. 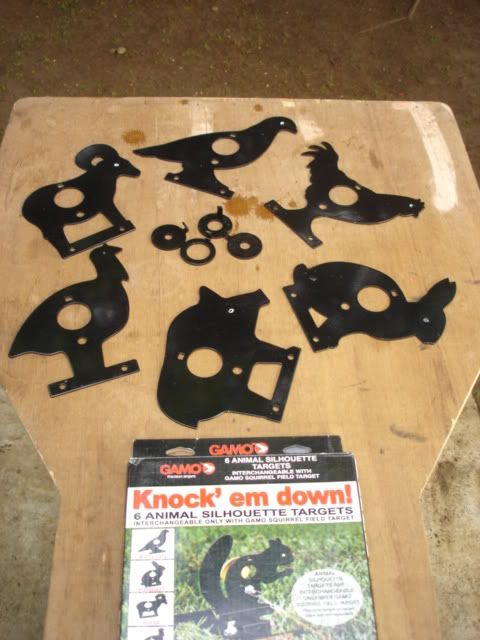 The whole set of goodies, 6-piece replacement figure with 4 hole reducers and the two standard FT sets (assembled squirrels) 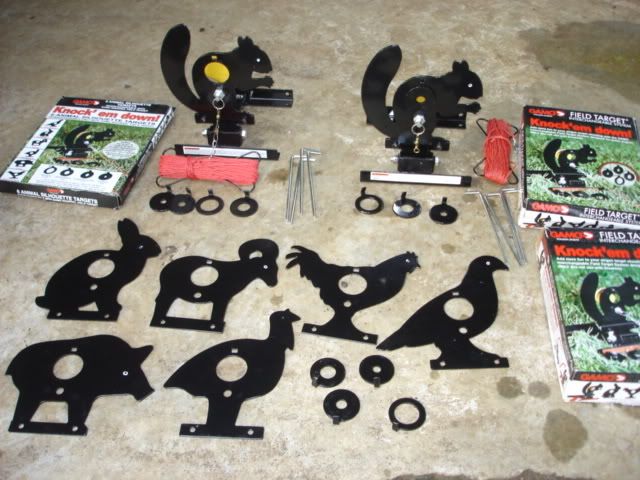 The two squirrels, one with the standard hole and the other with the 1/2" reducer. 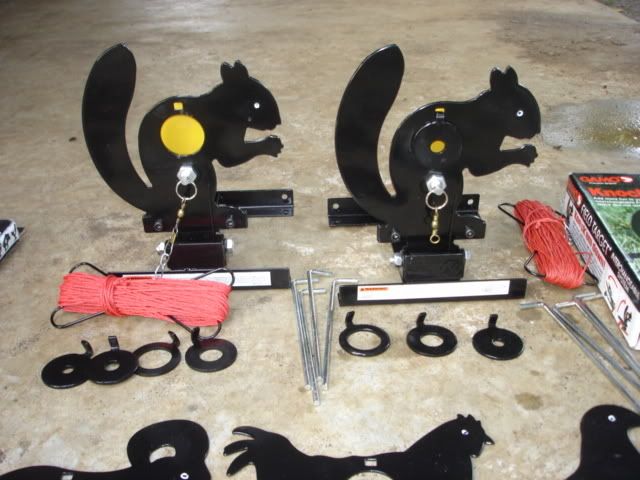 The plates are made of about 2mm metal sheet and the hole reducers are 3mm in thickness. I'm not sure if this will not have dents over time especially if shot at closer range using AG with high FPS. Only time will tell. The hole reducers are very easy to install just hook it in the hole and presto! smaller killzone. My only worry is if it will not fly out since there is no provision for it to be secured in place. The assembled target must be securely staked or secured as you will have difficulty resetting the target. Overall, it is a nice piece of equipment to have and surely a joy to shoot. The paddle mechanism works effectively and hitting the target other than the killzone will not knock-down the target. And the paddle needs only a low energy to move it, tried shooting the paddle with a blowgun and you knock it down. Resets easily too. Now time to do some actual field test and write more about it. Can't wait for the weekend.! |
|
rex
Full Member
  
Posts: 153
|
Post by rex on Jan 9, 2009 10:17:10 GMT 8
About the hole reducer,it will really fly off most of the time when hit.To secure it,just tie a rubber band on the hook at the back of the hole to hold it.Use the thick rubber band,when spooled around the hook it should be bigger than the hooks hole.
The smaller holes are really challenging,frustrating ,just don"t know the right words to describe when you knock down the smaller holes. More fun than hitting the bullseye on a paper.
|
|
|
|
Post by batmon on Jan 9, 2009 11:10:56 GMT 8
ambilis ah ni abot na d i.
tnx bro rex.
|
|
|
|
Post by snyper on Jan 9, 2009 22:07:35 GMT 8
About the hole reducer,it will really fly off most of the time when hit.To secure it,just tie a rubber band on the hook at the back of the hole to hold it.Use the thick rubber band,when spooled around the hook it should be bigger than the hooks hole. The smaller holes are really challenging,frustrating ,just don"t know the right words to describe when you knock down the smaller holes. More fun than hitting the bullseye on a paper. Thanks for the tip bro! will definitely try that out. I agree, shooting targets that fly or topple down gives a very positive reaction. |
|
cobra
Full Member
  
Posts: 105
|
Post by cobra on Mar 8, 2009 1:17:49 GMT 8
Bro,
San mabibili yung silos diyan sa pinas. Dito sa Dubai ang meron dito ay fixed targets with backstop at 5 knockdown target with reset target gawa rin ng Gamo.
|
|
|
|
Post by snyper on Mar 8, 2009 20:09:56 GMT 8
Bro, San mabibili yung silos diyan sa pinas. Dito sa Dubai ang meron dito ay fixed targets with backstop at 5 knockdown target with reset target gawa rin ng Gamo. the targets are actually courtesy of bro rex, Taga davao din who is also working abroad, and an avid airgunning enthusiast,you can find a lot of his posts in the forum. He sent us some samples so we can replicate them. |
|
cobra
Full Member
  
Posts: 105
|
Post by cobra on Mar 24, 2009 17:02:42 GMT 8
Bro.,
Can you give me the dimensions or templates of the parts so I can replicate them also. Maybe also improve it as well.
|
|
cobra
Full Member
  
Posts: 105
|
Post by cobra on Apr 16, 2009 19:04:57 GMT 8
Bro.
Puwede po ba magpabili sa kay Bro. Rex at air Parcel to Dubai UAE. Tanong ko lang how much yung isang set at yung padala? PM me kung nakausap niyo na siya at naaatanong yung damage. Tignan ko kung magkakasiya sa budget e send ko by Western Union ang bayad.
Thanks
|
|
|
|
Post by snyper on Apr 16, 2009 19:16:41 GMT 8
bro check out the prices at pyramid air. I believe dun bumibili si bro rex. I'll try to ask him too.
|
|
cobra
Full Member
  
Posts: 105
|
Post by cobra on Apr 27, 2009 12:49:34 GMT 8
Bro.
Tried Pyramid air, di sigurado kung darating dito sa Dubai yung order dahil USPS or by air parcel baka maharang ng customs. Yung inorder ko by USPS hanggang ngayon di pa dumarating talo na ko ng 20 dollars.
|
|
|
|
Post by snyper on Apr 27, 2009 20:28:25 GMT 8
Ganun ba bro, antayin mo nalang yung pics with sukat ng knock down targets. Para gawa ka nalang (DIY) will post it here for those who would like to make their own. In a couple of day, hope to get it posted.
Cheers!
|
|
rex
Full Member
  
Posts: 153
|
Post by rex on Apr 27, 2009 23:45:09 GMT 8
@ cobra
Ganun talaga bro kahit na USPS pagdating sa Pinas binubuksan nila para i-tax.
|
|
cobra
Full Member
  
Posts: 105
|
Post by cobra on Apr 28, 2009 0:53:07 GMT 8
Bro. Synper
Abangan ko yung DIY.
Bro Rex
Magkano ba yung taxes binayaran mo sa Pinas?
|
|
rex
Full Member
  
Posts: 153
|
Post by rex on Apr 28, 2009 1:40:13 GMT 8
Bro cobra
Few years ago maliliit na bagay pinapadala ko by USPS walang problema then for a year now
they gave a notice na they will subject all packages for custom duties.So I quit sending by mail instead been sending thru BB boxes.
|
|
cobra
Full Member
  
Posts: 105
|
Post by cobra on Apr 28, 2009 14:03:21 GMT 8
Thanks bro for the info.
Humina ang income ng Phil Post dahil the e technology kaya nag impose ng custom duties kahit d maramihan ang parcel. Better to sent it by Sea or Air Cargo na lang. Hirap pa naman magpuno ng Box.
|
|
|
|
Post by snyper on Apr 29, 2009 11:05:55 GMT 8
bro rex, you got pm. . .
|
|
|
|
Post by snyper on May 2, 2009 23:28:48 GMT 8
Here's a disassembly of a knock-down target. Purpose of which is to give readers an idea if they intend to DIY. Labels are not official part number names, so I hope I get them right. ;D 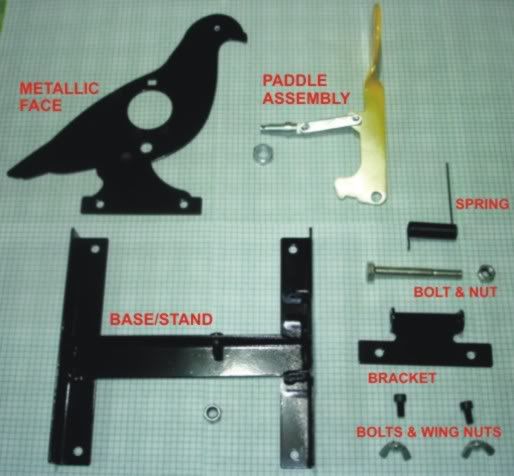 Here's the frame and the paddle assembly, the bolt will go in the bolt welded on the frame.  Here the paddle assembly is already attached in the frame/base, set it back so it won't bother you when installing the bracket that will hold the metal face.  These are the parts that will make the metallic face swivel back, the spring will aid in bringing down the target when the paddle is hit correctly even with a low powered strike.  Assemble the bracket and position the spring in the base/stand.  Insert the bolt through the base/stand, bracket and spring all the way to the other end and screw in the nut to hold everything in place.  Now we have the Metallic face/figure and the bolt and wing nuts, wing nuts are used because the stand assembly allows you to exchange different figures for this model. (nice feature)  Position the holes of the face/figure to match those on the swivel bracket, make sure the spring is on top note the picture.  Insert the bolts.  At the backside screw in the wing nuts.  Here we have all the major components assembled. Stand, Paddle Assymble, Face plate on swivel bracket. The bolt you see is used to hold the Paddle Assyt to the faceplate.  Insert the bolt on the paddle assy. through the hole below the killzone hole.  Screw in the nut on the front side.  Here it is completely assembled.  In its knock-downed position.  Another angle.  Here it is front view upright position.  The bolt holding the paddle assy and the faceplate has a small hole where you will attached the resetting string.  Install a keyring with a swivel (use those brass swivel for fishing)   And finally the string to reset the target when it falls.  |
|


