Post by snyper on Nov 30, 2008 9:12:02 GMT 8
Here's my Valiente with the stock refinished with a walnut stain. When I got it, it chronoes at about 710 FPS.

There are two versions of the Valiente Rifle as far as I know. The older versions are much better and the difference can be found in the trigger assembly and hammer spring cap according to my gunsmith friend, I was lucky to have the old version.
Stock underside
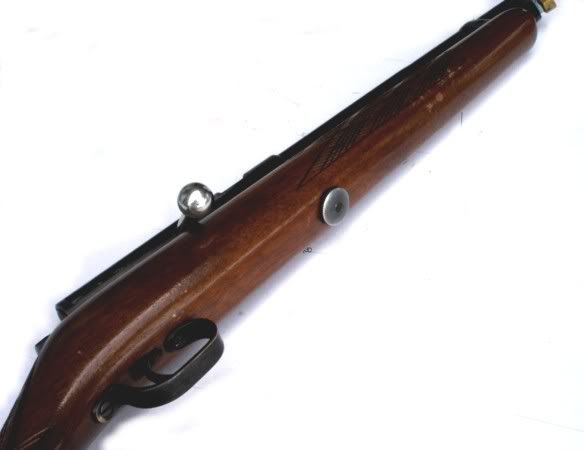
The hammer spring cap can be unscrewed by rotating counter clockwise and it also has the spring guide. On the newer versions there is no spring guide and the cap is not threaded. It is retained by the bolt used to attach the trigger assembly.
Unscrew retaining nut.
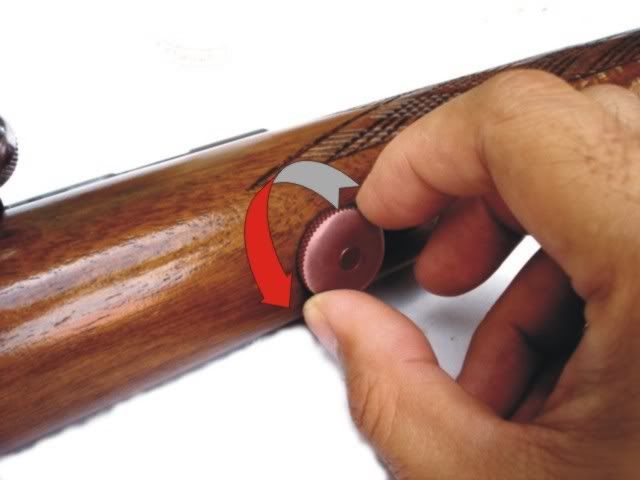
Pull the action away from the stock, give it a light tap if it won't budge.
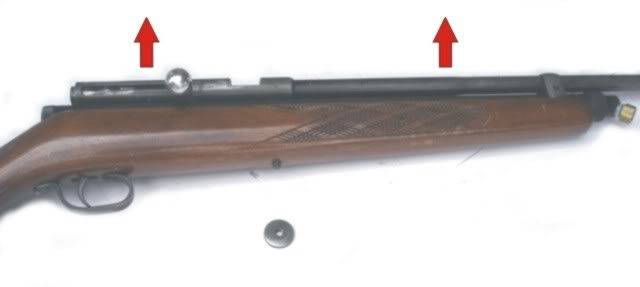
Here the Action is now separated from the stock, set aside the stock and keep the nut so you won't misplace it.
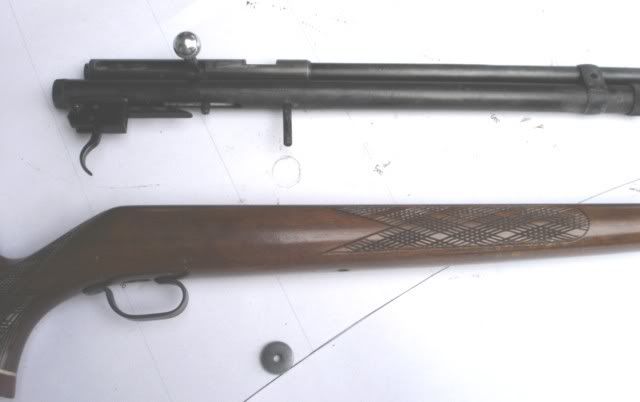
This is the action main sections are the Barrel, Air reservoir, Trigger.

To start dismangling the gun, lets start by removing the spring and spring guide.
Unscrew the end cap.
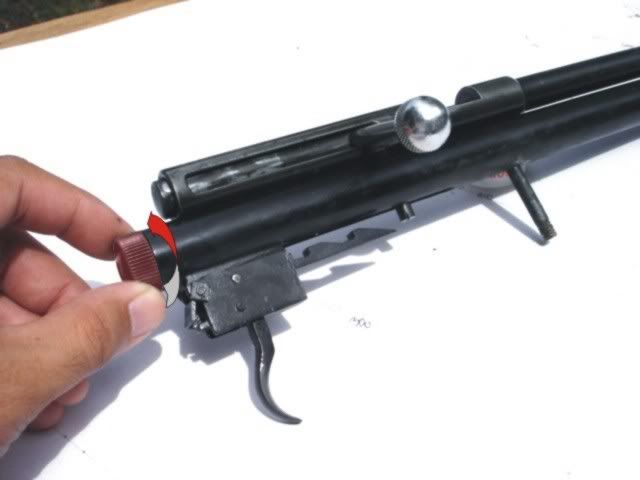
Pull it out.
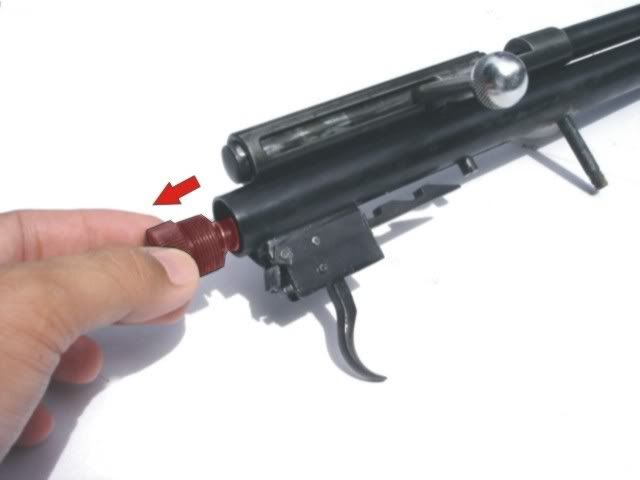
Here the End cap, spring guide and spring is now removed from the action.
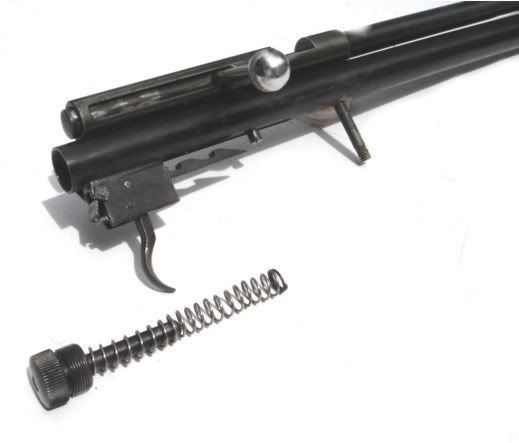
Now let'g go the the other end, and remove the air intake valve:
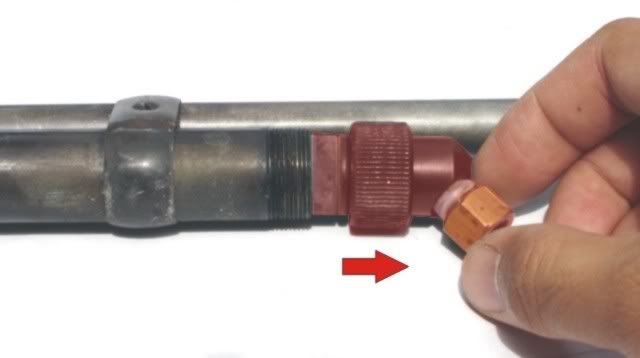
Unscrew retaining cap
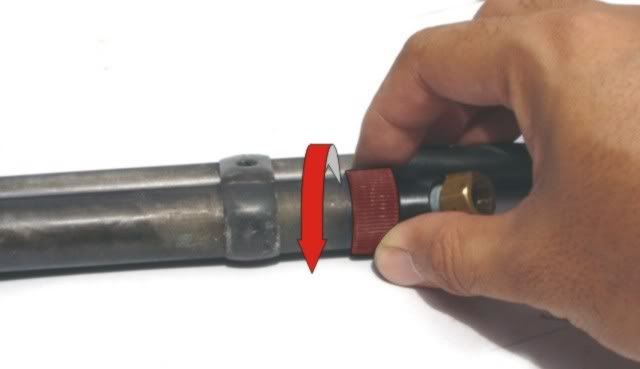
Pull-out the assymbly
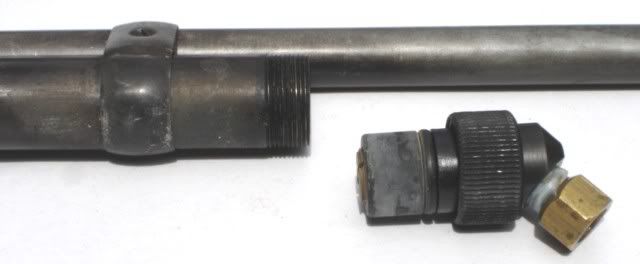
Air intake valve assymble removed from the air reservoir.
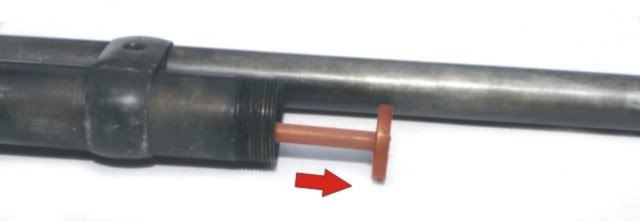
You can now pull out the push rod which holds the valve pin and spring.
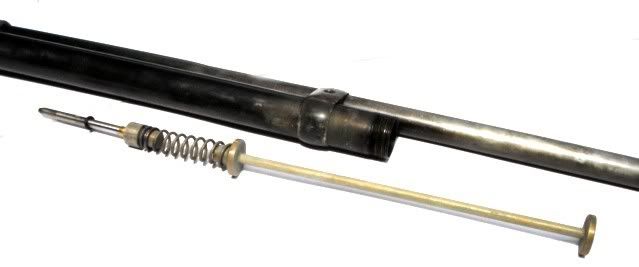
Here's the push rod, spring and valve pin out of the air reservoir.
Now we will remove the barrel from the action:
Unscrew the small bolt that joins the receiver and barrel.
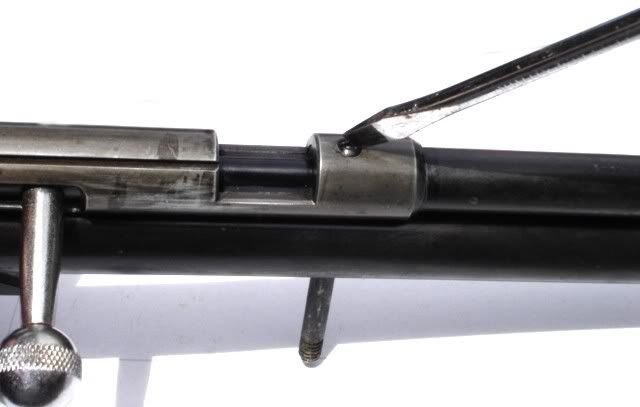
Then unscew the bolt on the barrel band, just loosen it enough to allow the tubes to move. Note that some barrel bands will have a small round ball that holds the tubes when the screw it tightened. MAke sure you don't loose it.
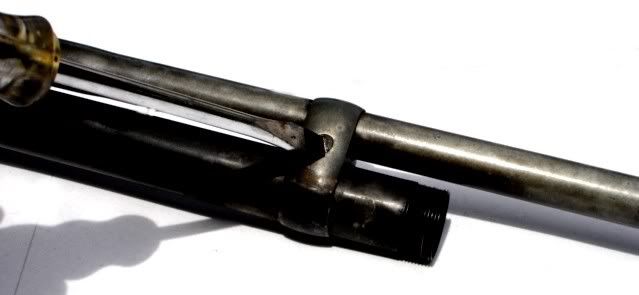
Now you can pull the barrel (and barrel band). The barrel is somewhat tapered and is narrower on the tip so you will need to move the barrel band with it.
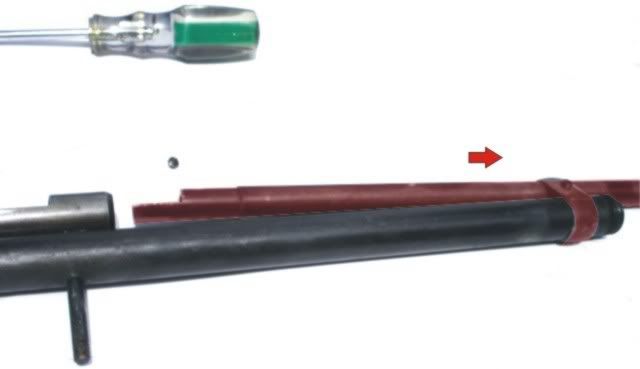
Barrel removed from Action.
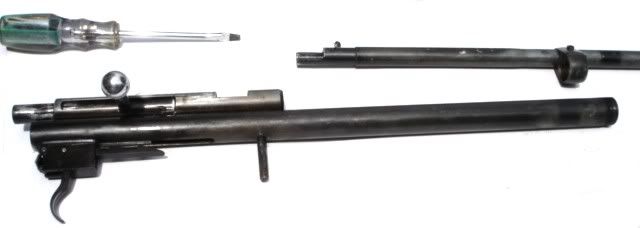
Next we need to remove the stud that locks the hammer to the trigger.
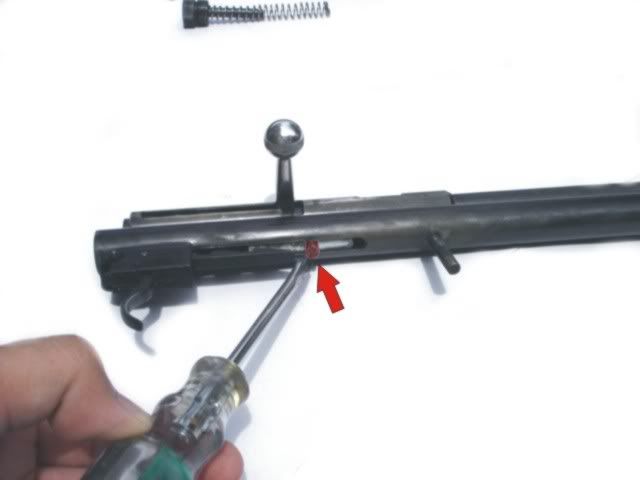
Once the stud is removed slide the hammer aside so we can access another screw that needs to be removed.
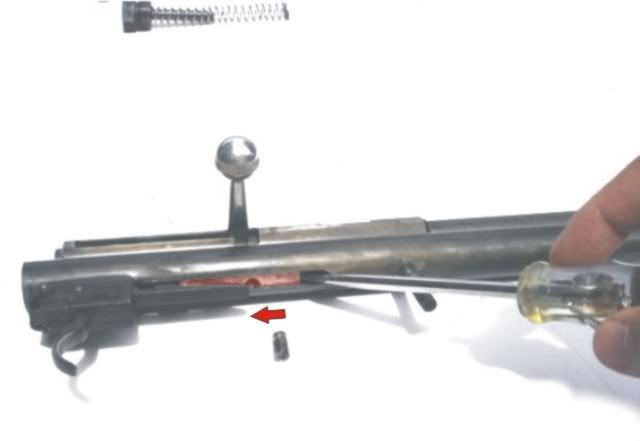
Remove this bolt/stud which holds the receiver. Set it aside so you won't loose it.
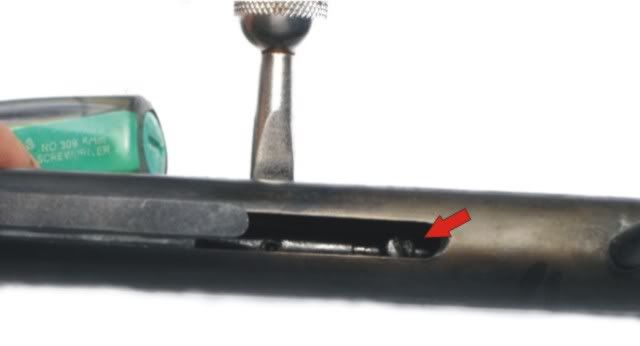
Removing Trigger parts, the trigger housing is welded to the tube so we only need to remove the parts. You need to unscrew the small bolts so you can remove the trigger and sears.
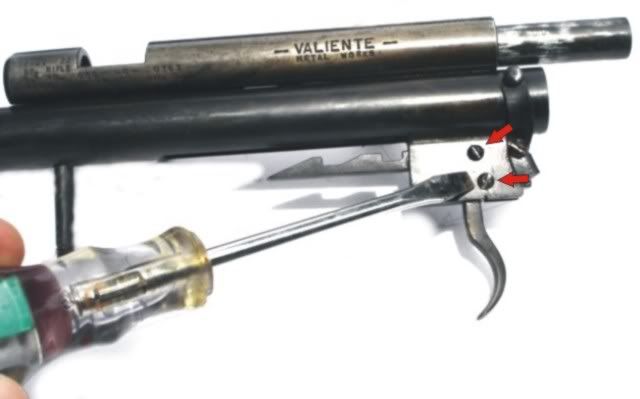
Once bolt is unscrewed, the trigger is easily separated from the housing.
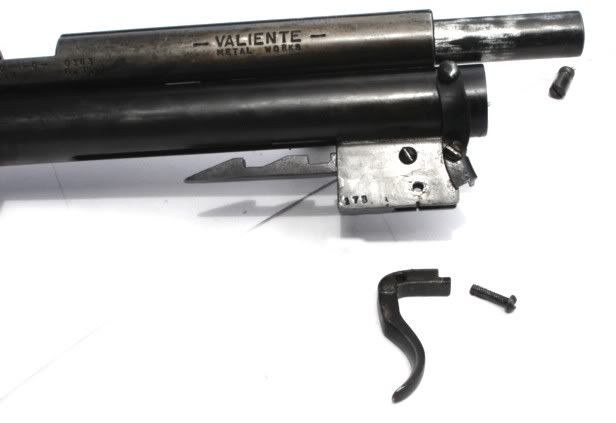
Before removing the second screw, you need to remove the sear spring, use a small screw driver to pry it out.
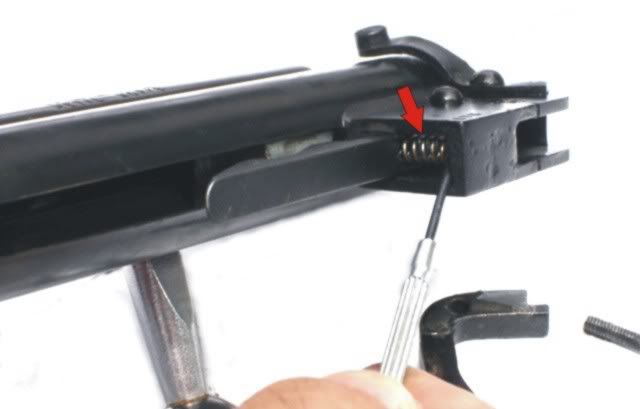
Be careful when prying the spring, it will fly off! So be ready to catch it, ;D
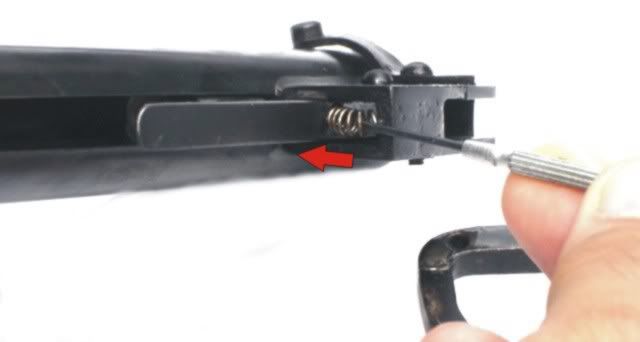
Now the the hammer sear is free moving you can remove the screw that holds it.
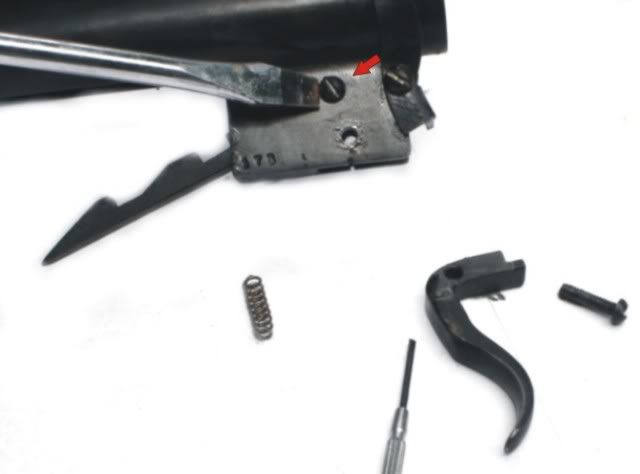
Trigger parts removed.
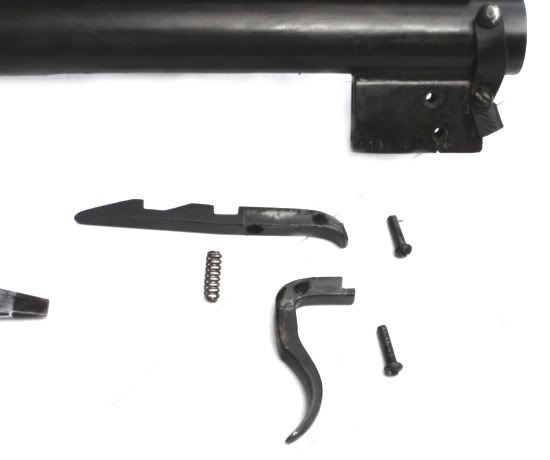
Now let's go back to the receiver portion of the action.
Remove this screw.
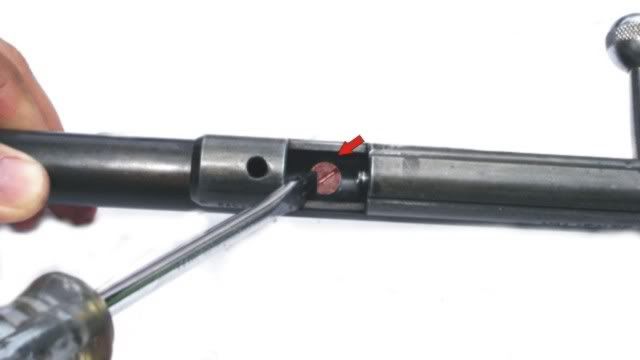
Pull out the receiver.
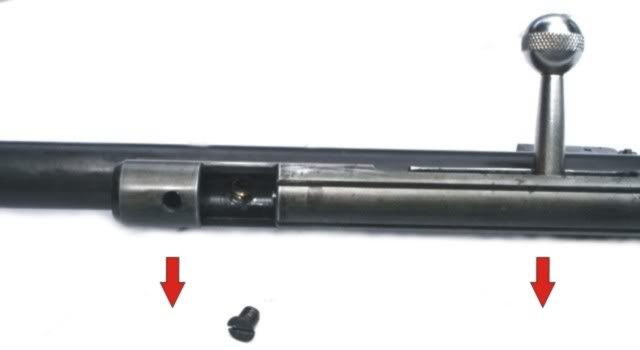
Once receiver and reservoir tube is separated may find an oval seal, don't loose that.
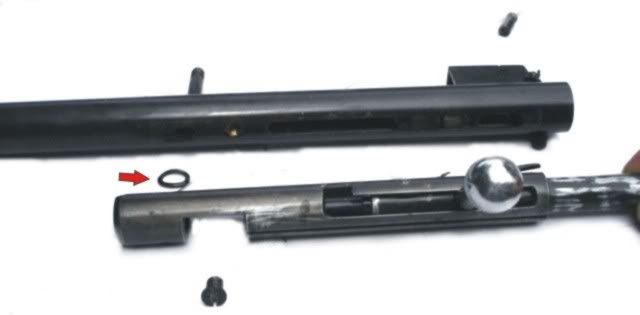
Here you will see the underside of the receiver, the oval shape is where the seal sits.
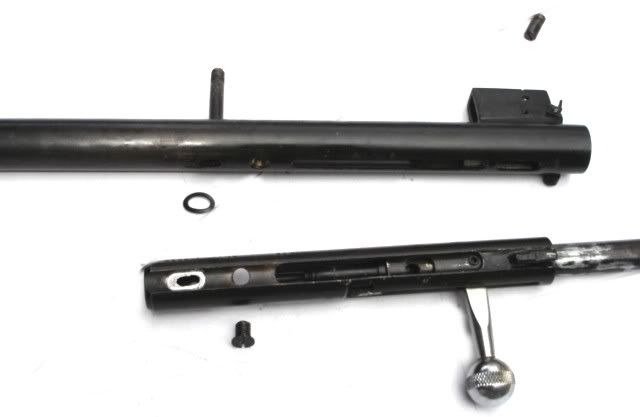
Here it is shown for a better view.
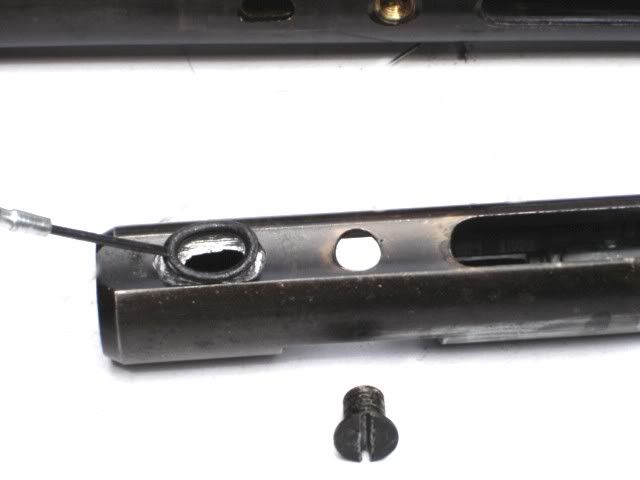
Now let us remove the bolt parts from the receiver:
We nee to remove the bolt handle first by unscrewing an allen head bolt.
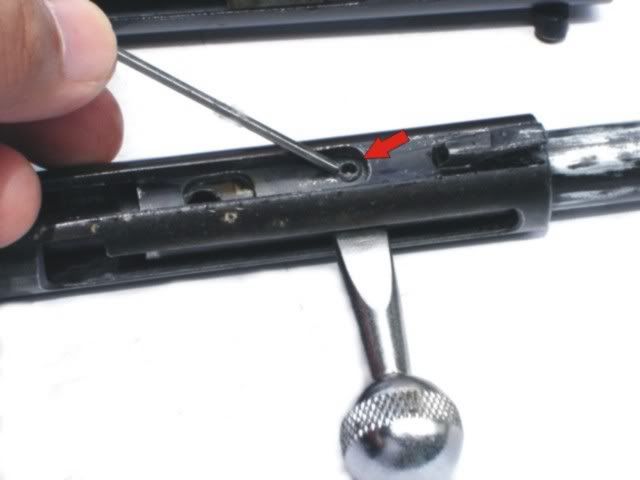
Once screw is removed pull out the bolt handle
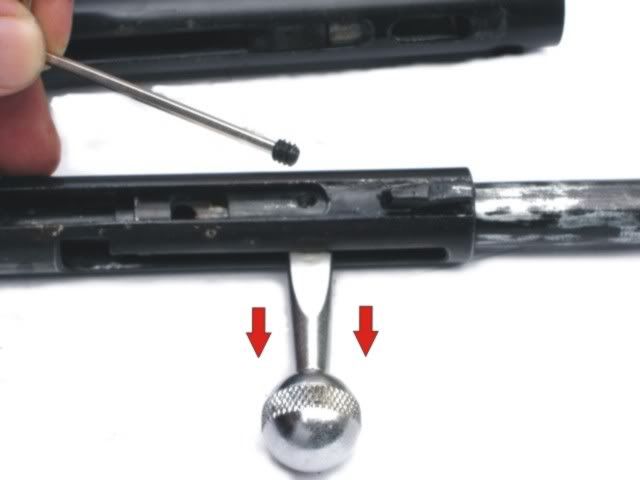
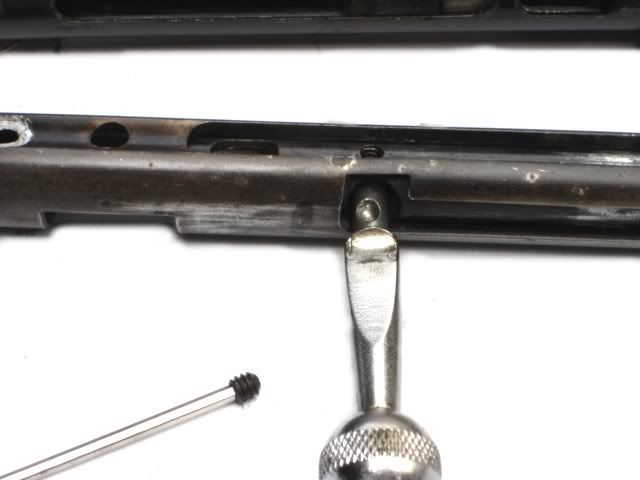
Here it is the bolt handle removed, now we can pull out the bolt from inside the receiver. You will need to slide it out.
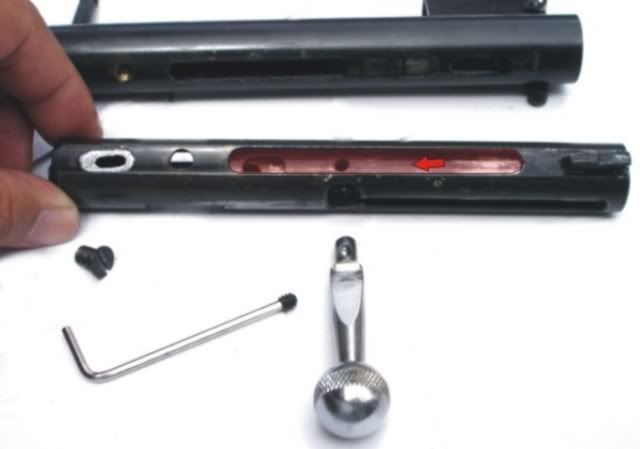
Pull out the bolt.
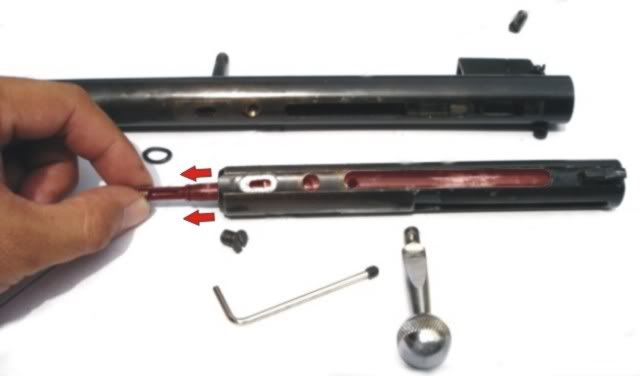
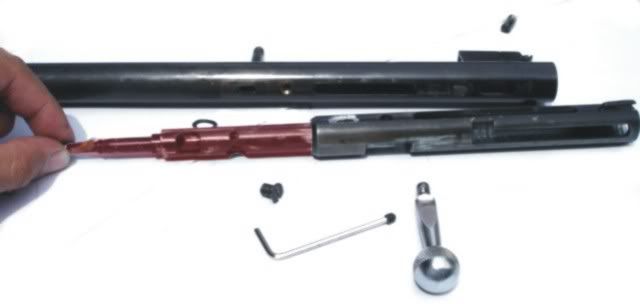
Bolt removed from receiver.
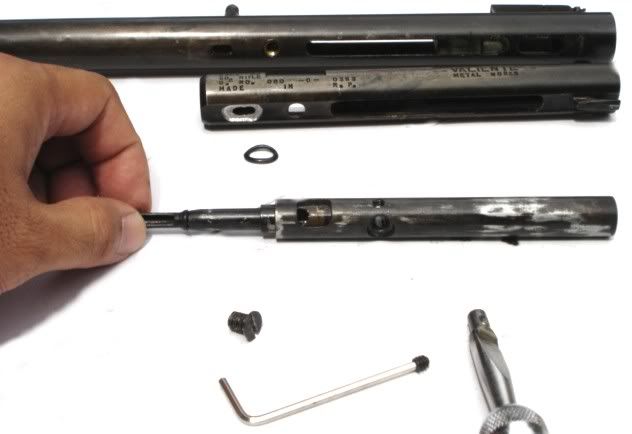
Now let's go back to the reservior tube and remove the hammer. Now that the path is cleared all you have to do is push the hammer out of the tube.
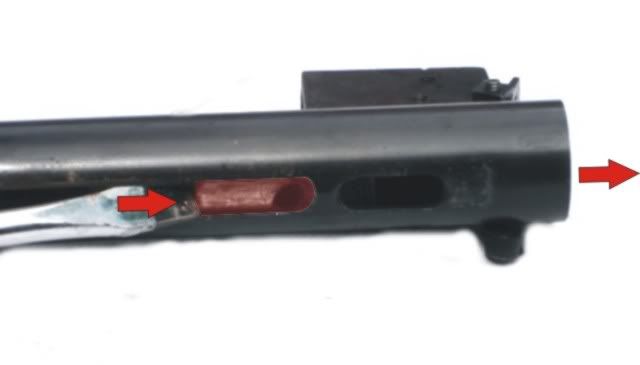
Here is the hammer removed from the tube.
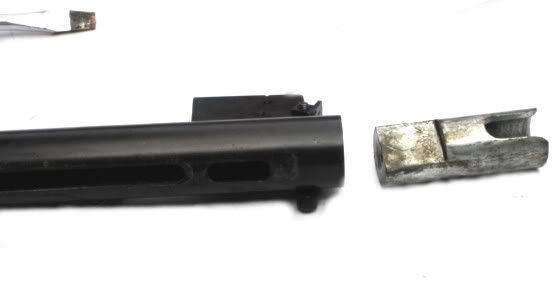
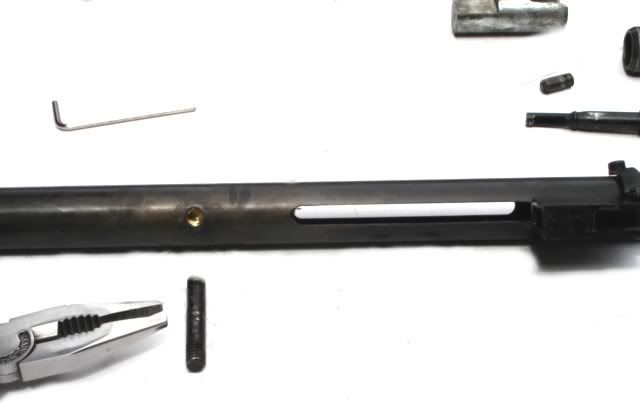
Also on the resevoir tube is the stud that holds the action to the stock. It also holds part of the valve assembly inside the tube. You don't really have to remove it.
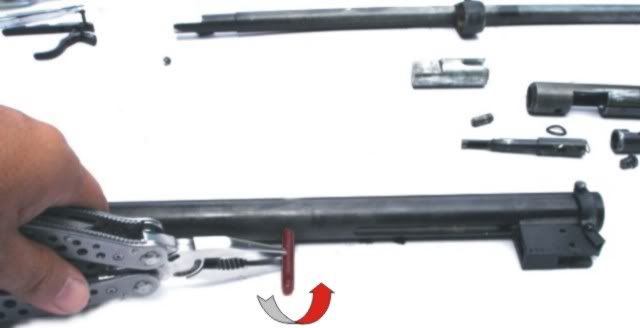
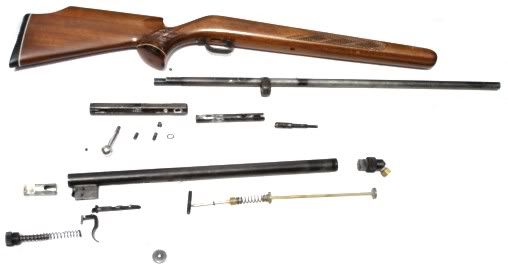
And finally, here's the exploded view of the whole gun.
Hope you find the procedure helpful in maintaining your Airgun should you need to open one with the same make and model.
Happy airgunning!

There are two versions of the Valiente Rifle as far as I know. The older versions are much better and the difference can be found in the trigger assembly and hammer spring cap according to my gunsmith friend, I was lucky to have the old version.
Stock underside

The hammer spring cap can be unscrewed by rotating counter clockwise and it also has the spring guide. On the newer versions there is no spring guide and the cap is not threaded. It is retained by the bolt used to attach the trigger assembly.
Unscrew retaining nut.

Pull the action away from the stock, give it a light tap if it won't budge.

Here the Action is now separated from the stock, set aside the stock and keep the nut so you won't misplace it.

This is the action main sections are the Barrel, Air reservoir, Trigger.

To start dismangling the gun, lets start by removing the spring and spring guide.
Unscrew the end cap.

Pull it out.

Here the End cap, spring guide and spring is now removed from the action.

Now let'g go the the other end, and remove the air intake valve:
Unscrew retaining cap

Pull-out the assymbly

Air intake valve assymble removed from the air reservoir.

You can now pull out the push rod which holds the valve pin and spring.

Here's the push rod, spring and valve pin out of the air reservoir.

Now we will remove the barrel from the action:
Unscrew the small bolt that joins the receiver and barrel.

Then unscew the bolt on the barrel band, just loosen it enough to allow the tubes to move. Note that some barrel bands will have a small round ball that holds the tubes when the screw it tightened. MAke sure you don't loose it.

Now you can pull the barrel (and barrel band). The barrel is somewhat tapered and is narrower on the tip so you will need to move the barrel band with it.

Barrel removed from Action.

Next we need to remove the stud that locks the hammer to the trigger.

Once the stud is removed slide the hammer aside so we can access another screw that needs to be removed.

Remove this bolt/stud which holds the receiver. Set it aside so you won't loose it.

Removing Trigger parts, the trigger housing is welded to the tube so we only need to remove the parts. You need to unscrew the small bolts so you can remove the trigger and sears.

Once bolt is unscrewed, the trigger is easily separated from the housing.

Before removing the second screw, you need to remove the sear spring, use a small screw driver to pry it out.

Be careful when prying the spring, it will fly off! So be ready to catch it, ;D

Now the the hammer sear is free moving you can remove the screw that holds it.

Trigger parts removed.

Now let's go back to the receiver portion of the action.
Remove this screw.

Pull out the receiver.

Once receiver and reservoir tube is separated may find an oval seal, don't loose that.

Here you will see the underside of the receiver, the oval shape is where the seal sits.

Here it is shown for a better view.

Now let us remove the bolt parts from the receiver:
We nee to remove the bolt handle first by unscrewing an allen head bolt.

Once screw is removed pull out the bolt handle


Here it is the bolt handle removed, now we can pull out the bolt from inside the receiver. You will need to slide it out.

Pull out the bolt.


Bolt removed from receiver.

Now let's go back to the reservior tube and remove the hammer. Now that the path is cleared all you have to do is push the hammer out of the tube.

Here is the hammer removed from the tube.

Also on the resevoir tube is the stud that holds the action to the stock. It also holds part of the valve assembly inside the tube. You don't really have to remove it.


And finally, here's the exploded view of the whole gun.

Hope you find the procedure helpful in maintaining your Airgun should you need to open one with the same make and model.
Happy airgunning!


